
In order to import ToolsUnited tools into TopSolid, you first need to download and install the ToolsUnited Importer for TopSolid (developed in collaboration with WeSt GmbH). To download tools from ToolsUnited, you need a ToolsUnited account. You should turn on the direct export button for TopSolid in the export interface configuration.
ToolsUnited is a manufacturer-independent web-based database for tool data. We can search for tool data with 3D graphic information, specify names of tools or even search for our tools in the extensive classification of ToolsUnited. For example, I enter a diameter of 20 mm, a cutting edge length of 30 and get an overview of all tools stored with this data. I can filter by corner radius, by manufacturer, by projection length, by clamping system and so on and so forth. In the detailed view of a tool, I get all the information that the manufacturer has provided, including the information that is relevant for the export to TopsSolid, and I can start the export with a simple push of a button. The 3D graphic is generated by ToolsUnited according to the data provided by the manufacturer. Now I copy this tool to my own area, where I can use it and in a further step assemble it to complete tools. Another way to search for tools is the application search. There I start from the machining process I want to create and search here for the corresponding tool. I now search for a machining process for turning, still select the size of the tool and get a list of search hits. There are 600,000 and more components in it from all relevant manufacturers. Most of them just with the data for 3D graphics and with the data for the adoption of the TopSolid. I also copy this tool now in my own area, in my tools and start the TopSolid export.
2:45 min: Export
When assembling a complete tool, I can now use all the components that exist in ToolsUnited or that I have copied in my own area. I start with the empty complete tool first with the cutting part. I take from my own tool now the cutter, which I copied there before, I can look here again all information to this cutter and add now this Fraser to the complete tool. Now I can search for a suitable chuck from the ToolsUnited dataset via the separator upwards I can again look at the information here and, if necessary, add components to the complete tool on top of that. However, we would like to leave it with these two components for now. My complete tool will then be displayed in the list of complete tools and I can again start the export to TopSolid.
4:11 min: Import
The import into TopSolid itself is done with the free importer. Here I simply open the downloaded zip files containing all the tool information and start the import. This works for simple tools as well as for complete tools. The tools are created in TopSolid with all the relevant information and functions so that they can be used directly, such as with this turning tool here.
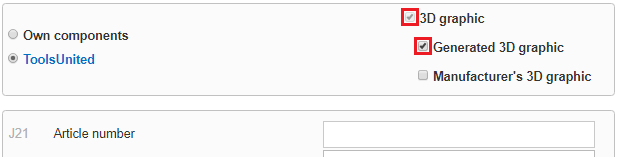
Tools for the TopSolid interface have to be at least capable of 3D generation. Therefore, when searching for tools, the checkmarks “3D Graphic” and “Generated 3D graphic” should be set.
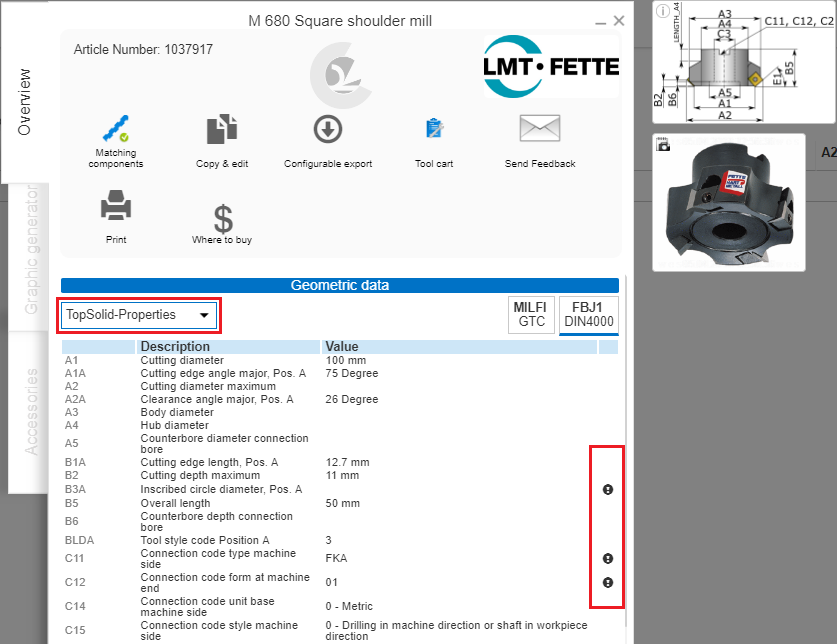
The TopSolid button only appears, if the tool meets the requirements. You can switch to the TopSolid properties in the tool data sheet by selecting it from the drop-down list on the left under “Geometric data”. If the tool is not TopSolid capable, you will see an explanation to the right of the corresponding features.
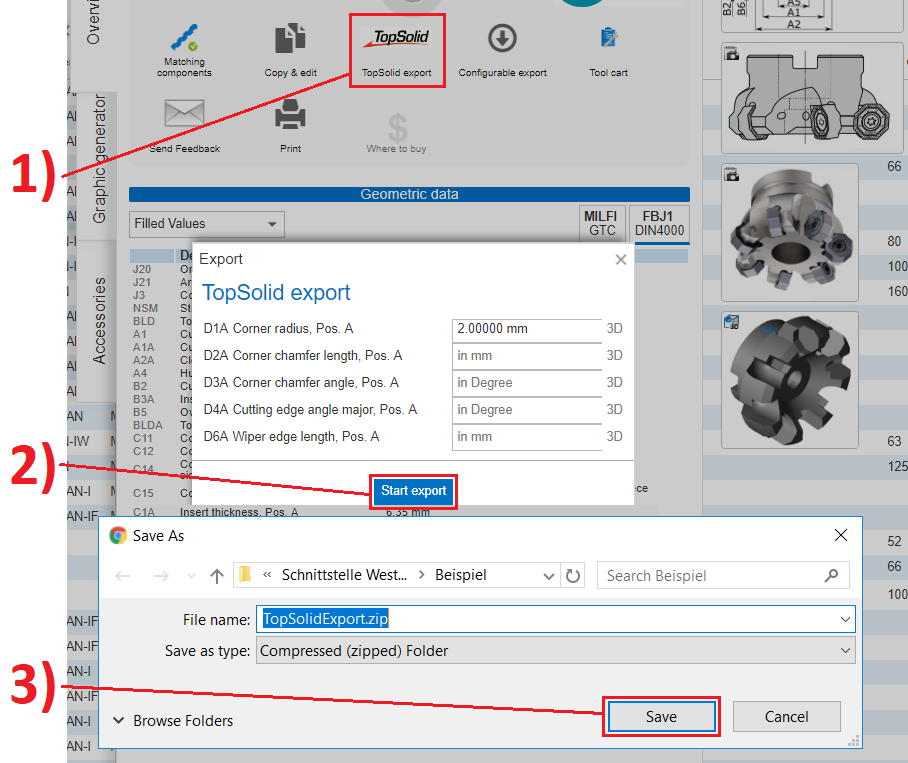
Select a tool capable of TopSolid export and click on the TopSolid button (1). The export window appears. For tools with indexable inserts, the corner design of the inserts can now be adapted. When exporting tool baskets, however, it is not possible to adjust the corner design.
Click “Start export” (2) and save the file to your hard drive (3).
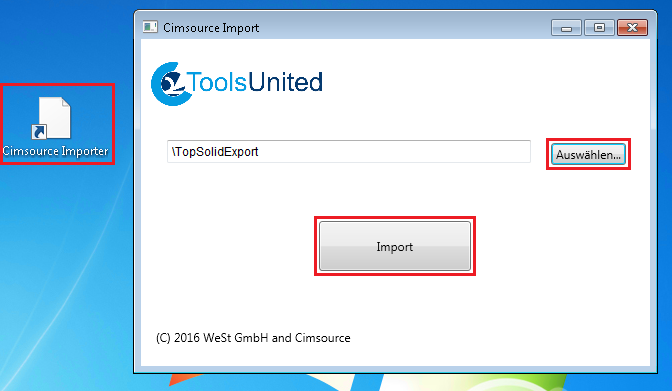
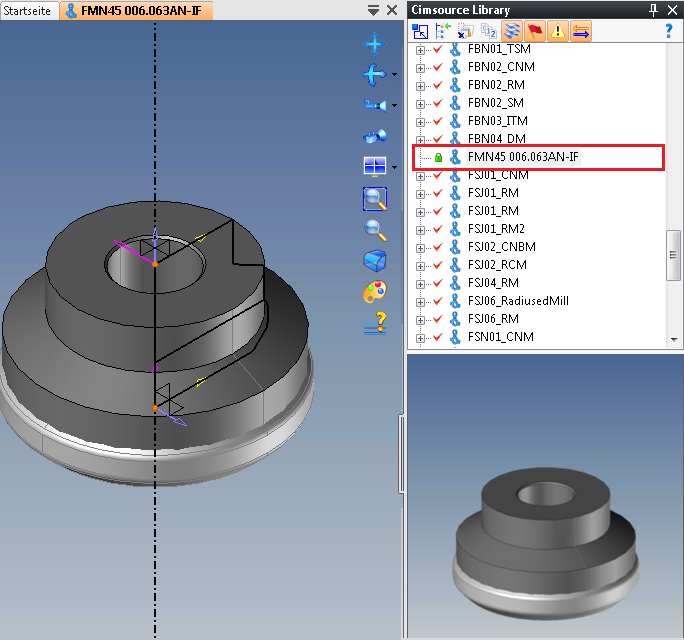
Now open the Cimsource Importer, select the downloaded tool and click “Import”.
The program will open TopSolid automatically.
On the right in the “Cimsource Library”, the newly added tool is highlighted in gray and can be opened with a double-click.

CIMSOURCE
CIMSOURCE’s standards and technologies are key to synchronize the master data management of tool suppliers and the manufacturing data management of tool consumers.
Since developing Standard Open Base (StOB) in 1992, CIMSOURCE has been organizing the product databases of tool suppliers, and the tool data of manufacturing operations.