

You can use the export functions in the header section of the tool data sheet to export tool data in various formats. The available export options can be customized to meet your specific needs.
Watch the How-To Video
Watch the tutorial to gain a better understanding of the workflow and available functionalities.
Follow the Step-by-Step Guide
Everything you need to know, explained step by step.
1
Configuring Tool Data Export
Open Settings
Click on your username to access the ToolsUnited settings.
2
Configure the export interface
Select the menu item “Configure Export Interface”.
Here you will see all available export interfaces.
3
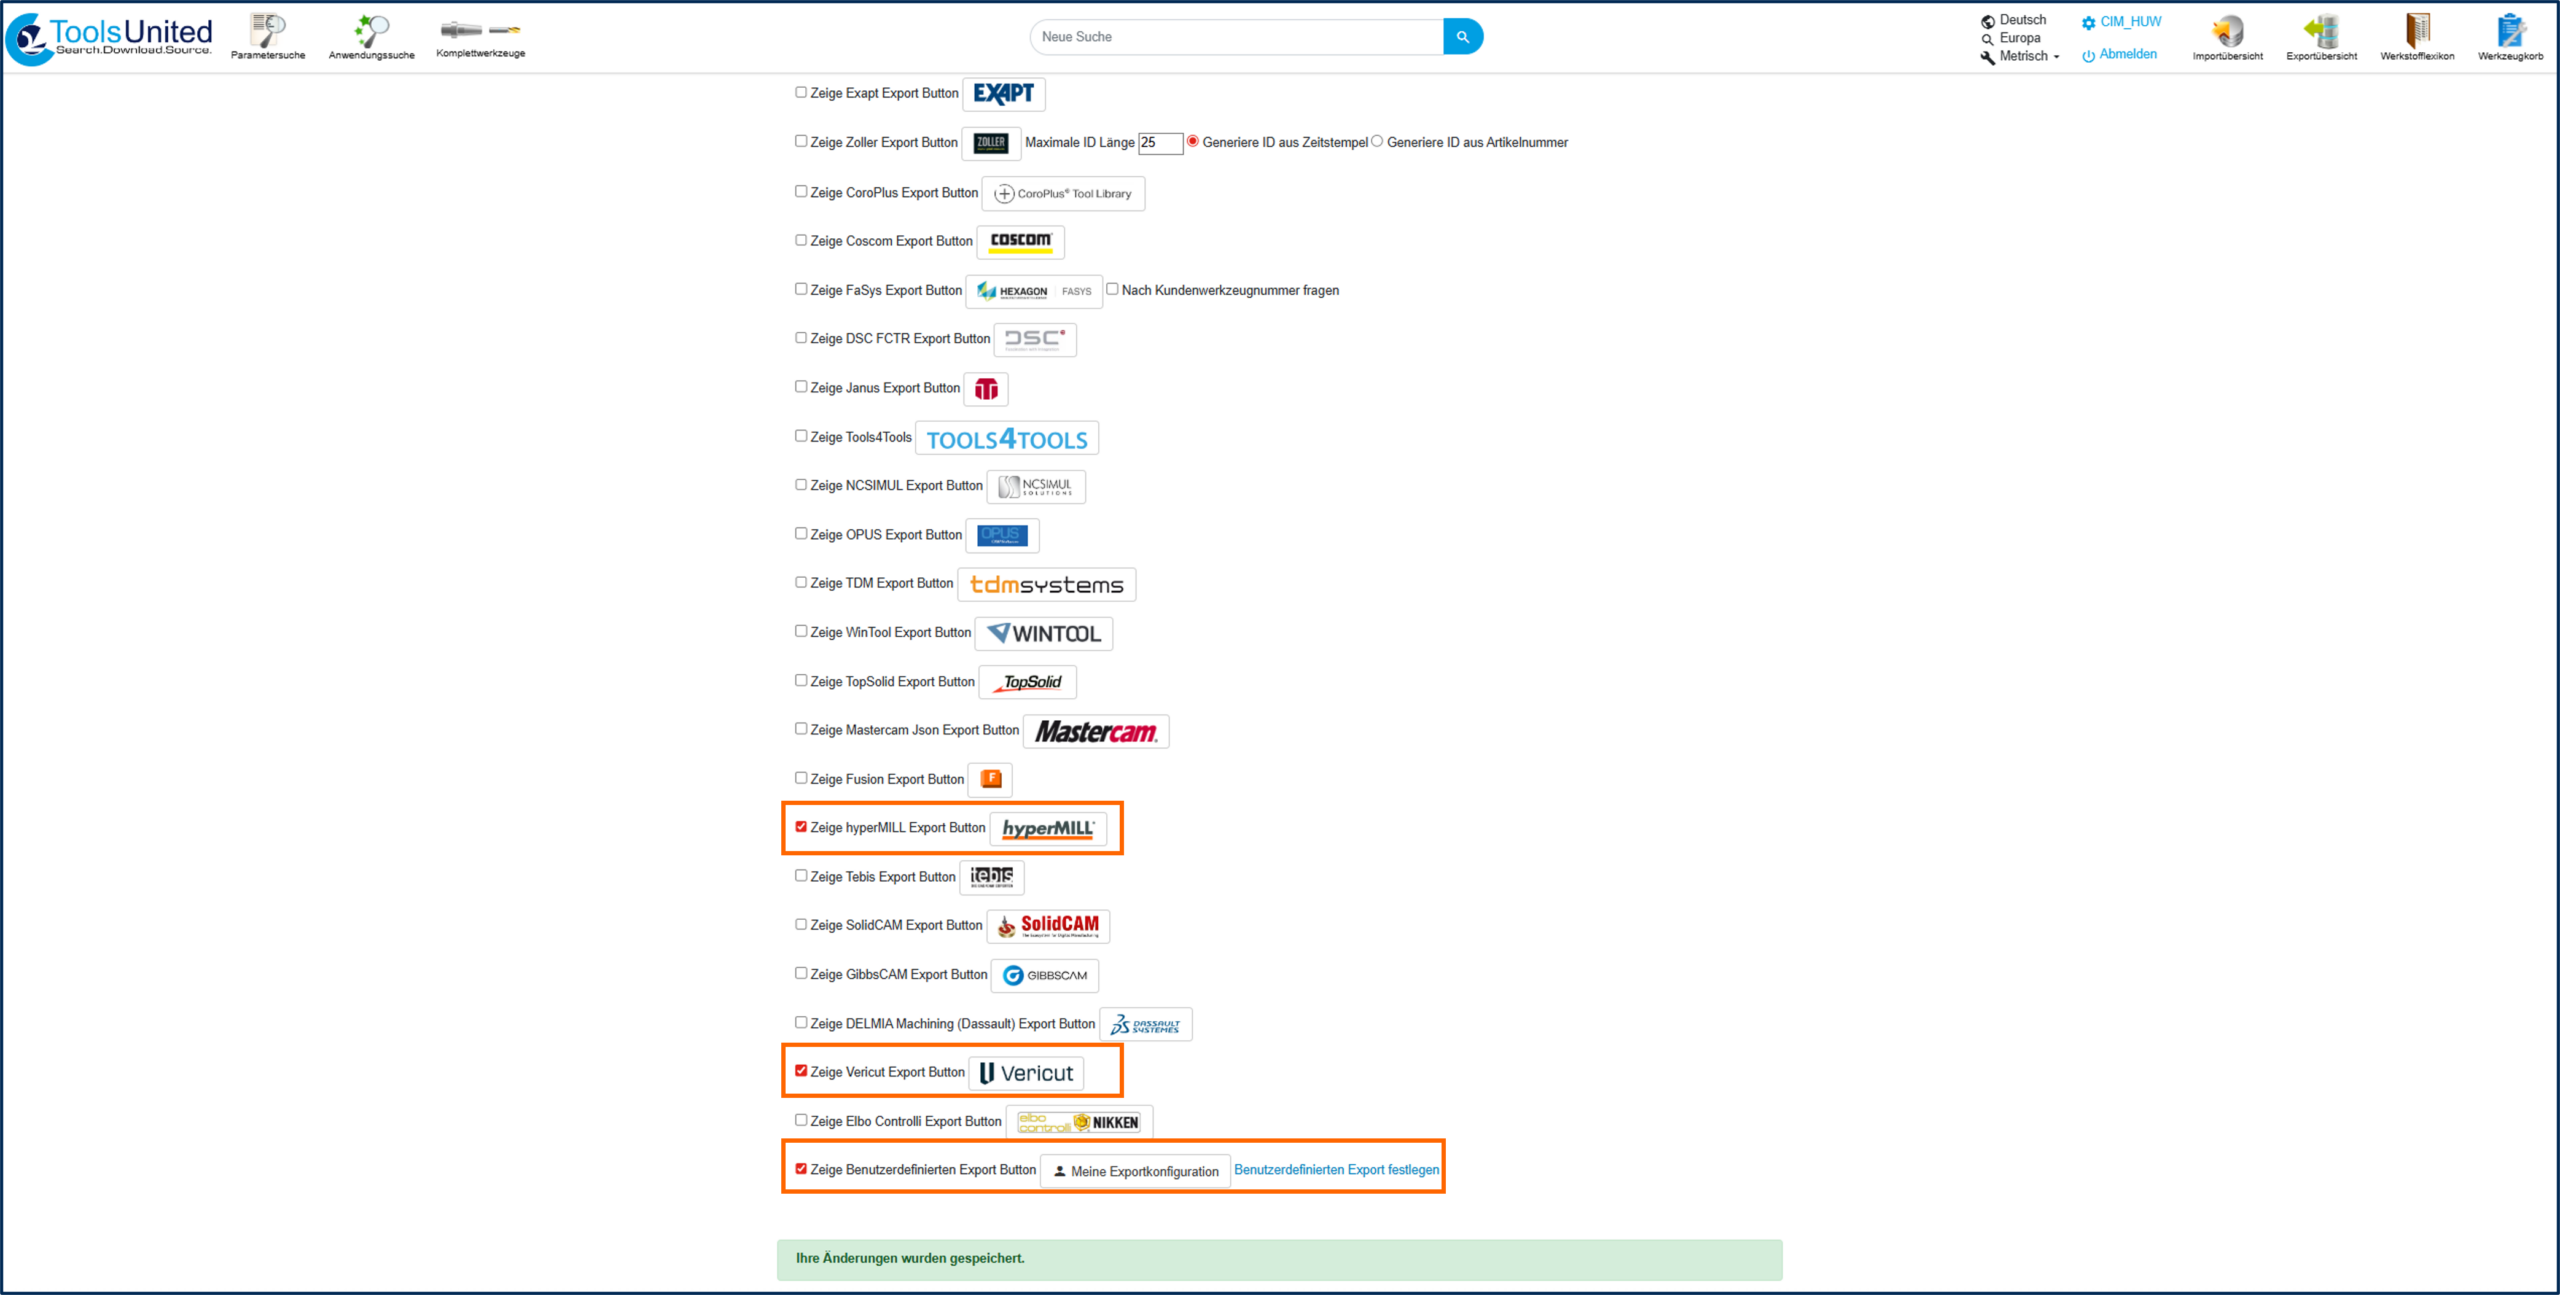
Select export interfaces
Select the desired export formats by checking the corresponding checkboxes.
These will then be available directly in the tool data sheet.
4
Define a custom export (optional)
You can also configure your own default export in XMLformat:
Based on existing interfaces
Freely selectable tool properties with a single click
Selected data is highlighted
Changes are applied when you save
5
Save configuration
Finally, save your settings.
The selected export options will then be available directly in the tool data sheet.
6
Check data sheet
The selected export options will then be available directly in the tool data sheet.